yes i feel blessed to have learned from the master

anyway here is how i do it. first you gotta get a clear( no finger joint) section of railing maybe 2 feet longer than you need. next i fasten 2 1x4's along the edges to give it a nice straight form to run through my table saw.
i cut off 5/8ths of an inch of the railing from both sides adding the 3/4 inch from the 1x4's , so that i remove the "profile" from the edge of the railing. you will be left with a 1 1/4 or so piece of the railing that is the center of the rail. i take this section and cut it into 3/8ths inch strips (3) .
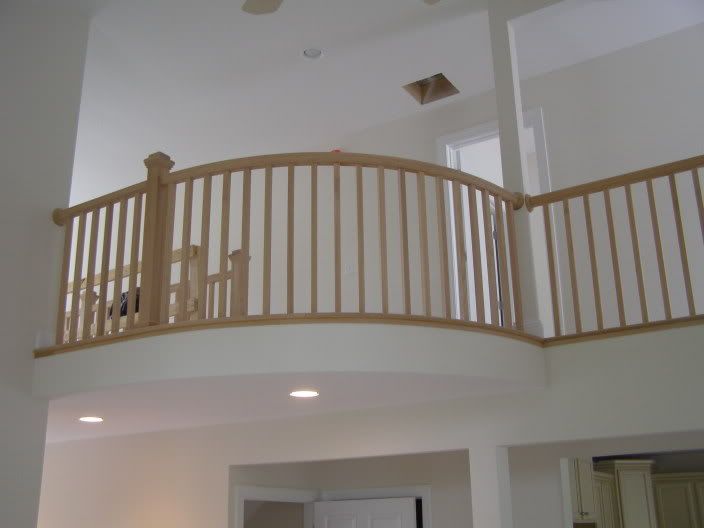
i use cardboard and make a template of the balcony edge so i get the curve just right. you will use this for a template to not only get the correct curve but to make the floor nosing too.
once i have the template curve i draw it on the floor and scribe whatever width i want the noser to be, this way when i make the rail it will fit right in the center of the curve. once i have established the fake noser on the floor i scribe a center mark along the radius, this is the center of the railing. i measure half the width of the railing on both sides from the center line and make the radius for my blocks to hold the rail. i block off every 6 inches or so with blocks that will hold the rail on both sides at the curve i want.
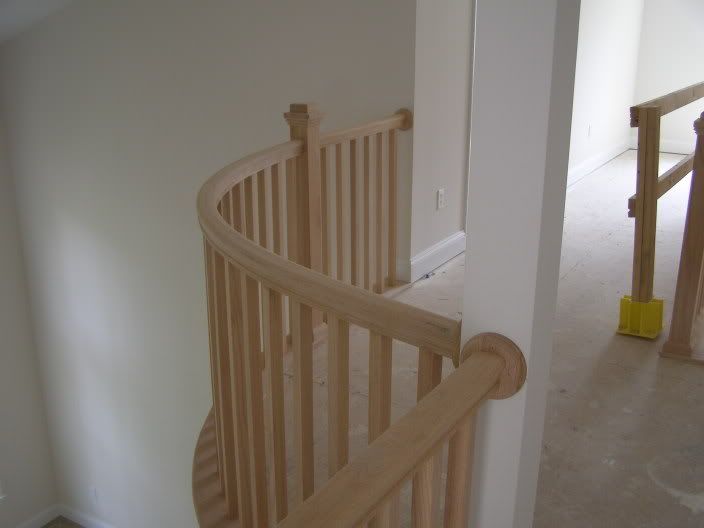
starting with one of the profiles i slip it in between the blocks i made on the floor. i then take the 3 pieces of 3/8ths inch ripped railing and glue the hell out of it and slip them into my jig .with all the strips it allows the oak to bend and pieces can move back and forth as needed. i then take the final profile piece and force it into the jig i made, if i did everything right it will have to be forced pretty good to get it into the jig. i then take shims and put them against the blocks and the railing making sure it tightens back to where the rail has no voids in it. no need to worry about lining up the tops and bottoms perfect because this will all be belt sanded to perfection later.
everything is glued with plenty of pro-bond wood glue from elmers , and then i nail 1 1/4 inch brads that leave very small holes all along both sides of the railing. i leave it sit in the jig overnight and remove it the following day. i then take matching putty and fill any voids or nail holes before sanding.
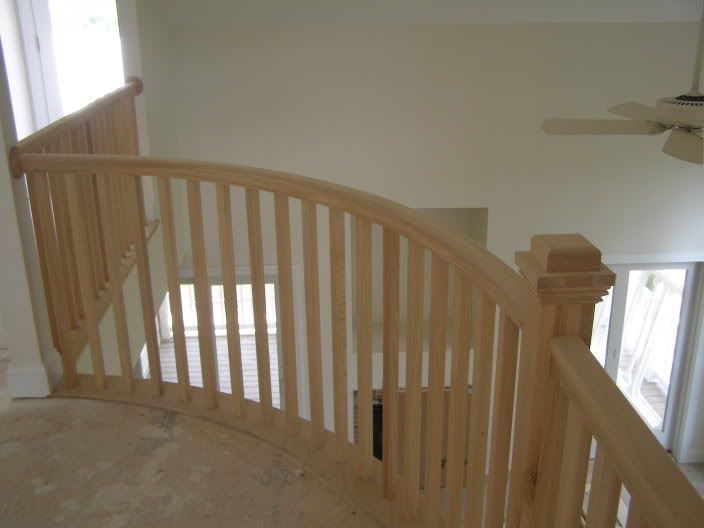
i then take a belt sander and start with 50 grit paper and eventually work through to 80 grit then 120 and finally 150 grit and sand the living hell out of it until it blends itself back into what appears to be a solid rail again. it is then ready to be cut and placed on the noser so i can establish where any posts and such will be. i cut the rail and then mark where the post goes, so i dont screw up all the previous work.
the noser is made from laminated plywood . using the template i mark the profile and then taking a scribe i mark the inside line along the same curve to the desired width. generally most take 2 pieces that have to be spliced together so care is taken to get the grain in the correct direction where they meet.
once i get this done i sand it smooth along the cut edges and splice , glue and nail it to the floor. i then take a piece of noser that is 1 1/2 inches wide with the rounded profile. i cut 5/8ths off the rounded part which is about all the thicker it can be to get it to bend, sometimes like in this application it needs to be wetted down to get it to curve. i take the remaining 3/4 of the noser and rip it into 2 3/8ths inch strips again.
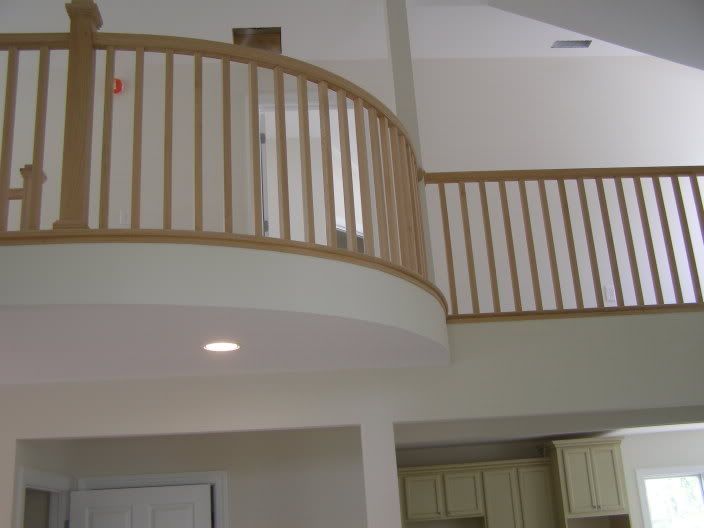
with the plywood nailed into place i then just start layering the strips around the edge and glue and nail it very good. after the 2 layers of 3/8ths strips are done i finish it with the rounded profile part glueing and nailing it. i putty and sand until again it blends back into a single piece . i lay the rail on it and mark the post location and mount the post then mount the railing and tada its near complete. filling in the ballisters is rather simple compared to the rest lol. this particular railing took just around 34 hours to complete, patience as always is the key to success ..
kinda hard to explain , i could show ya how easier i think lol but everyone should get the general idea on how.
now if anyone ever needs something like this done you will know who to call

so is that the way you do it Todd

;D


 .
.